Macro Photography
"how to take close-up pictures of small things"by Philip Greenspun for photo.net.
|
|
Macro Photography"how to take close-up pictures of small things"by Philip Greenspun for photo.net. |
macro \'mak-(.)ro-\ aj [macr-] 1: excessively developed : LARGE, THICK 2: of or involving large quantities 3: GROSSTaking close-up pictures of small things is called "macro photography." I have no idea why. Perhaps because the small things in macro photography are generally larger than the things you are taking pictures of when doing "micro photography". If you really want to be pedantic then you should say you are doing "photomacrography".
First, though, you want to take a picture of the moon. That's pretty far away, so you feel comfortable setting the lens focusing helical to "infinity". The "nodal point" of the optics will now be 50 millimeters from the plane of the film. [Note: exposure for the moon should be roughly f/11 and 1/film-speed.]
The effort of setting up your tripod is so great that you become tired and fall asleep. When you wake up in the morning, there is a bear standing 10 feet away. You refocus your 50mm lens to get a picture of the grizzly. As you turn the helical from "infinity" to "10 feet", notice that the optics are racked out away from the film. The nodal point is a bit farther than 50 millimeters from the film plane. The lens is casting an image circle somewhat larger than the 24x36mm frame. Some of the light gathered by the lens is therefore being lost but it isn't significant.
After snapping that photo of the bear, you notice that his fangs are glistening. These aren't going to appear very large in your last shot, so you move up until you are about 1.5 feet from the bear. That's about as close as the Nikon lens helical will let you focus. The nodal point is now pretty far from the lens. Extra light is spilling off to the edges of the frame , but still not far enough to require an exposure correction. The bear's face is 1.5 feet high. You've oriented the camera vertically so that the face fills the 36mm dimension. 36mm is about 1.5 inches. So that means you are working at "1:12". The subject is 12 times the size of the subject's image on film.
You're losing some light, but also you notice that you don't have too much depth of field. A 50mm lens focussed down to a foot from the subject only has a depth of field of 1/16th of an inch at f/4. No problem. You haul out a big electronic flash and stop down to f/11. Now your depth of field is a whopping ... 1/2 inch.
Looking down, you become fascinated by some pattern's in the bear's claws. Each one is about 1.5 inches long. You'd like to fill the 35mm frame's long dimension with a claw, which means that the subject and its image will be the same size. You want to work at "1:1". But those scumbags at Nikon skimped on the helical. You can't rack your optics out far enough to focus at 1:1. It looks like that pine needle tip photo is completely out of the question.
Why did Nikon limit your ability to focus close? For starters, at 1:1 your lens would be so far away from the film that it would cast a huge image circle. The standard 35mm frame would only be a tiny fraction. So only about 1/4 of the light gathered by the lens would reach the film. A scene that required a lens setting of f/16 at infinity would require a lens setting of about f/8 at 1:1. All this other light would be bouncing around inside your camera and lens, reducing contrast. Finally, a fixed stack of optical elements can't be designed to form sharp images at so many different focussed distances.
A photo shop could never sell you a "magnifying glass" for $50 so they call these things "supplementary lenses" or "close-up lenses". Good things about close-up lenses:
I never use close-up lenses but they are described fairly thoroughly in the Kodak Professional Photoguide.
 What you want is a macro lens. Fortunately, it is difficult to buy a
bad macro lens. This is kind of odd in a world where 90% of the lenses
sold are bad. Here's my theory: Every day at least one man wakes up and
says to himself "I have a 1.5 inch long penis; I think I will buy a big
SLR like a pro. But I don't want to spend money on frills like lenses so
I'll get a Tokina zoom." However, no man ever wakes up and says to
himself "I have a 1.5 inch long penis. I think I will buy a macro lens
so that I can make a 1:1 photograph of my penis and distribute this
photo from my Web server. But I don't want to spend too much on this
lens so I'll try to find a cheap Sigma."
What you want is a macro lens. Fortunately, it is difficult to buy a
bad macro lens. This is kind of odd in a world where 90% of the lenses
sold are bad. Here's my theory: Every day at least one man wakes up and
says to himself "I have a 1.5 inch long penis; I think I will buy a big
SLR like a pro. But I don't want to spend money on frills like lenses so
I'll get a Tokina zoom." However, no man ever wakes up and says to
himself "I have a 1.5 inch long penis. I think I will buy a macro lens
so that I can make a 1:1 photograph of my penis and distribute this
photo from my Web server. But I don't want to spend too much on this
lens so I'll try to find a cheap Sigma."
In short, anyone in the market for a macro lens is already fairly sophisticated and quality conscious. If you read USENET then you know that the world is full of people asking "is this $150 Tamron 75-300 zoom as good as a $900 Nikon 300 prime?" Can you blame Tamron/Tokina/Sigma for trying to separate people like this from their $150? But there isn't apparently a big enough collection of fools in the market for macro lenses to support a junky macro lens subcategory.
In my humble opinion, the best macro lenses are the latest autofocus mount models made by Nikon (my primary 35mm system is Canon EOS, by the way). Nikon makes 60mm, 105mm and 200mm focal lengths. Each lens will focus continuously from infinity to 1:1. You can shoot the moon and capture the bear claw without stopping to change lenses or screw in filters. How do these lenses work? Do they just have a much longer helical than the 50mm normal lens? Yes and no.
Yes a macro lens helical has much more travel than a normal lens helical. You can watch the front element move an inch or two. However, these helicals aren't just pushing a stack of glass back and forth like the 50mm's helical. Inside one of the elements is moving ("floating") so that the optical design changes to a more appropriate one for close-up photography. Thus you get sharp images at all focussed distances.
How do you choose a focal length? The same way you do with a non-macro lens. If you can't get very close to your subject at a soccer game, you don't pull out a 50mm lens; you get a 300. If you can't get close to an insect without it getting scared and flying away, then you want the 200mm lens and not the 50. If you want to compress features in a woman's face, you don't get a 28mm lens; you get a 105mm lens. It is the same with macro work; longer lenses give you a flatter perspective.
 What about other companies? Canon makes 50, 100, and 180mm macro
lenses. All three incorporate floating elements. The 50 is cheap but
it only goes to 1:2 without a "life size converter" (sort of like a
telextender) that you stick between the lens and the camera. The 50 is
also annoying because it has the ancient non-USM Canon motor. So it
can't do simultaneous AF and MF like the ring-USM lenses. The 100 goes
to 1:1 but also has the old-style motor. The 180/3.5 is a new design
with three low dispersion elements, a tripod mount, and USM for
full-time manual focus. It is also compatible with the Canon
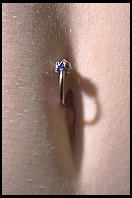
telextenders. At right, you can see about as close as one can get with
the Canon 50 (from my infamous Christina
page; part of the reason that photo.net is banned by most of the Net
censorship services).
What about other companies? Canon makes 50, 100, and 180mm macro
lenses. All three incorporate floating elements. The 50 is cheap but
it only goes to 1:2 without a "life size converter" (sort of like a
telextender) that you stick between the lens and the camera. The 50 is
also annoying because it has the ancient non-USM Canon motor. So it
can't do simultaneous AF and MF like the ring-USM lenses. The 100 goes
to 1:1 but also has the old-style motor. The 180/3.5 is a new design
with three low dispersion elements, a tripod mount, and USM for
full-time manual focus. It is also compatible with the Canon
telextenders. At right, you can see about as close as one can get with
the Canon 50 (from my infamous Christina
page; part of the reason that photo.net is banned by most of the Net
censorship services).
Tamron makes a newish 90/2.8 macro lens that goes to 1:1. It is
probably pretty good.
|
If you feel like spending a lot of money then what you want is a 6x6 cm
Rollei 6008. The 120/4 Zeiss
Makro-Planar (same lens as for a Hasselblad) will set you back about
$3400. That's right, you could buy a Nikon 105/2.8 macro lens and three
N90 bodies for the price of the Rollei lens alone.
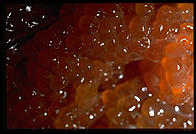
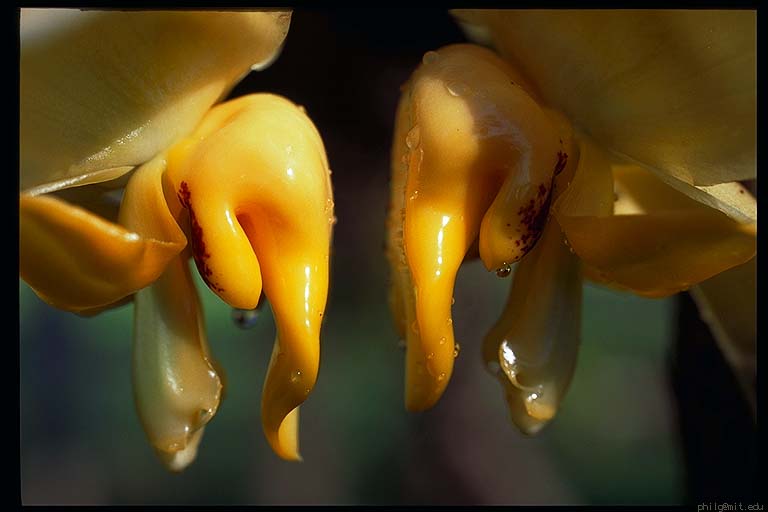
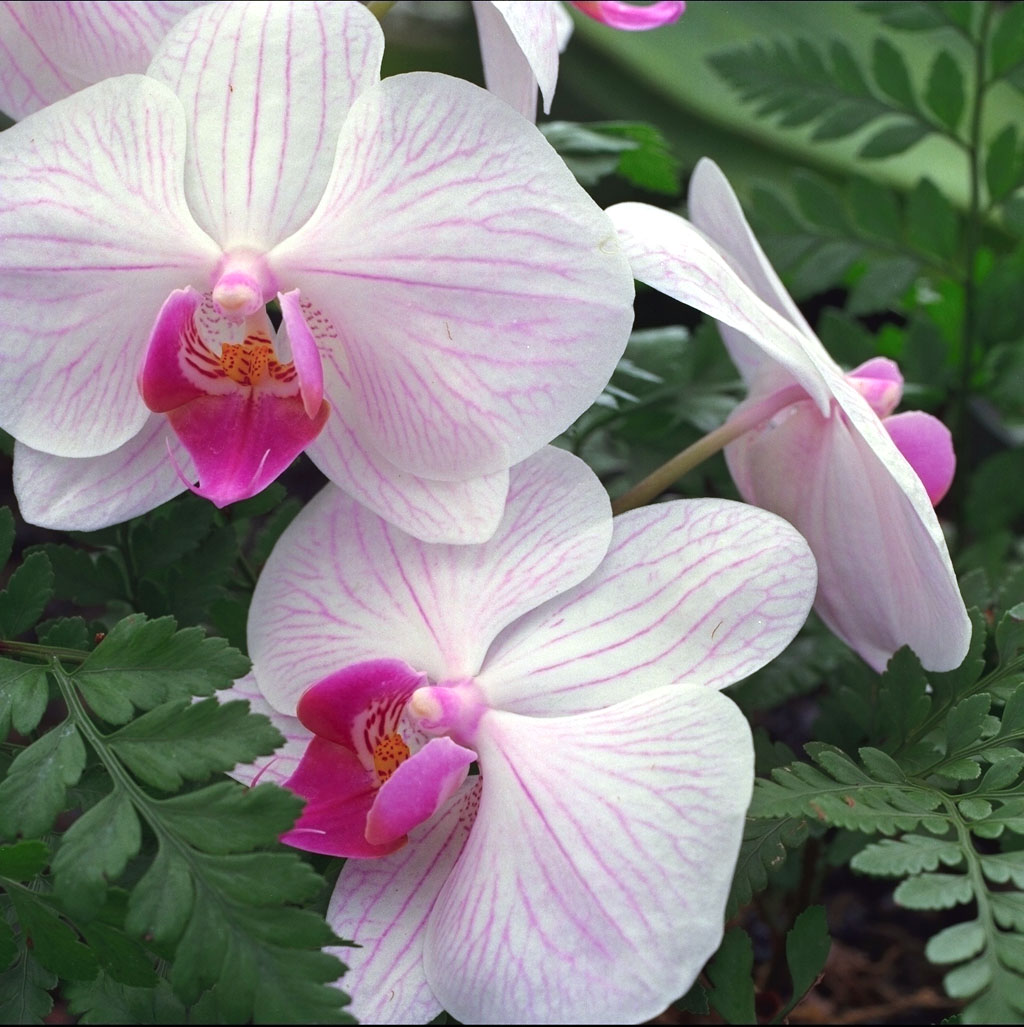
Rollei probably has the most intelligently designed macro system in the world. I photographed these orchids at left in Hawaii with the 120 Zeiss macro lens, Kodak Gold 100 film (120 size naturally), tripod, f/16 and 1/15th of a second. |
Taking pictures through a pinhole results in tremendous depth of field but very low sharpness due to diffraction. This is why lenses for your 35mm camera stop at f/22 and don't go to f/45 or f/64. View camera lenses provide these smaller apertures for two reasons: (1) the lenses are longer (f/64 on a 210mm lens is not all that small a hole); (2) the negative won't be enlarged very much.
If you're at 1:1 and have selected f/22 on the macro lens barrel, you need to look at the lens markings and/or the close-up exposure dial in the Kodak Professional Photoguide to learn that your effective aperture is f/45.
If you're using a handheld meter, then you absolutely must use these corrections (e.g., meter says f/22 but you're focussed down to 1:1 so you set f/11 on the lens barrel).
[Note: the modern Nikons, e.g., 6006, 8008, N90, show you the effective aperture in the viewfinder; the F4 does not; Canon EOS cameras do not. Another reason to go with the Nikon system if you are into macro photography.]
Lighting is the most important and creative part of any kind of photography. I've written an entire book chapter on the subject so I'm not going to try covering it here.
I'm too lazy to maintain an aquarium so I just tried this at the public one in Monterey. My equipment was a Nikon 8008, 60mm AF macro lens (set for manual focus), SB-24 flash, SC-17 extension cord. I wiped the glass with a handkerchief, asked my friend to hold the flash, and pushed the lens hood up against the glass:
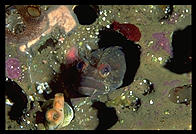
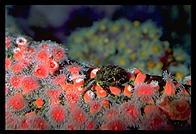
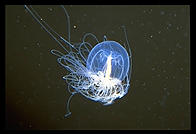
I'm still trying to figure out how I managed to get a lawyer in that last frame...
That's why people buy macro focusing rails. These are little rack and pinions capable of moving the entire camera/lens assembly forward and back. You use the tripod to roughly position the camera/lens and then the macro rail to do fine positioning.
Here's a basic introduction to the tools, though...
First, you can get a bellows (flexible accordion) and/or some extension tubes. These will let you push the lens farther away from the camera body. Extension tubes are rigid and tough; they only let you separate your body and lens in fixed increments. Bellows are delicate but they let you continuously control the lens distance from the body. How much magnification this extra extension will get you depends on the focal length of the lens. If you have a 1000mm lens that already needs its nodal point 1000mm from the film plane to focus at infinity, then a 50mm extension tube isn't going to be worth much. However, if you have a 50mm lens, then that same 50mm extension will take you all the way to 1:1.
Second, you probably want a "reversing ring" for your lenses so that you can turn the back element of the lens toward your subject. Why? Think about the normal way you use a lens. You are taking a picture of the Statue of Liberty. The Statue of Liberty is larger than 24x36mm. So you point the front element of the lens at the statue and the back element at the (smaller) film. Your lens is designed to work like this, taking the large and compressing it into the small. However, if you are working at 10:1, where the tip of a pine needle is going to take up a big portion fo the frame, you want the lens to take the small and expand it into the large. So you want to just flip the lens around.
Third, once you've reversed the lens, you probably want some way to retain the automatic diaphragm. You want the aperture to remain fully open until just before your exposure and then close down to the selected shooting aperture. My old Rollei 6008 had all-electric lenses so you could do this with a clean and reliable electric contacts. Nikon has mechanically stopped-down diaphragms for backward compatibility so they can't do this; you end up with a strange dual cable release contraption. Canon EOS has all-electric lenses but in 10 years they haven't figure out how to engineer a bellows or reversing ring so don't hold your breath (instead they make a kludge to adapt their ancient Canon FD macro system to the EOS).

 At left are a couple of Ant Robots built at the MIT AI Lab by James McLurkin. Photographed
with Canon EOS-5 and Canon 50/2.8 macro lens (lit by off-camera 430 EZ
flash). This lens only goes to 1:2.
At left are a couple of Ant Robots built at the MIT AI Lab by James McLurkin. Photographed
with Canon EOS-5 and Canon 50/2.8 macro lens (lit by off-camera 430 EZ
flash). This lens only goes to 1:2.
At right is a detail of the ant claws, which was taken with the Raynox
MicroExplorer. The Raynox is a set of close-up lenses available for
about $150. I mounted the 6X lens on a Canon 35-350L zoom lens (the
kit also comes with 12X and 24X lenses). Yes, in the end I stuck a
magnifying glass in front of my lens.
 Here is the original ant claw picture. You can see that vignetting
was severe at f/16. Fortunately, I could see this in the viewfinder
to a large extent with the DOF preview and Adobe PhotoShop papers over
a lot of photographic sins. Vignetting is the principal drawback of
the MicroExplorer and it is apparently worse at small apertures.
Here is the original ant claw picture. You can see that vignetting
was severe at f/16. Fortunately, I could see this in the viewfinder
to a large extent with the DOF preview and Adobe PhotoShop papers over
a lot of photographic sins. Vignetting is the principal drawback of
the MicroExplorer and it is apparently worse at small apertures.

 A couple more example MicroExplorer shots (at left is an Ant robot
detail; at right is a quarter on a $20 bill, full frame at f/8 (I
think)). Note that vignetting is not as severe as it was at f/16
(above left).
A couple more example MicroExplorer shots (at left is an Ant robot
detail; at right is a quarter on a $20 bill, full frame at f/8 (I
think)). Note that vignetting is not as severe as it was at f/16
(above left).
[ | related links ]
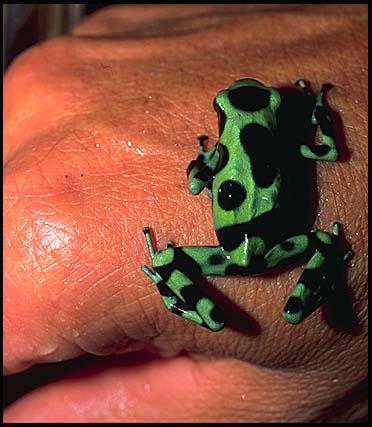
Frog: Canon EOS 50 macro. 430EZ with Off Camera Cord 2. From my Costa Rica story.
Orchids: Canon EOS 50 macro. Tripod and natural light. Fuji Velvia. From Hacienda Baru in Costa Rica.
Text and pictures copyright 1991-1997 Philip Greenspun.