Film Cameras
by Philip Greenspun; created June 1999 and revised January 2007
Home : Learn About Photography : Making Photographs : Film Cameras
by Philip Greenspun; created June 1999 and revised January 2007
Home : Learn About Photography : Making Photographs : Film Cameras
We've arrived at the last and, to my mind, least important chapter in the text. As noted on the cover page, this is where most photography textbooks start. Generally your choice of camera will not have much effect on the final image. Certainly the brand of camera that you choose will have virtually no effect. However, if you're a nerd like me, there is a certain satisfaction in knowing what tools are available to the photographer and how they work.
Here are the factors that go into the choice of a camera for a project:
Suppose that your project demands high image quality and high magnification. For example, you are going to make a 20 x 24 inch enlargement and display it in a corridor where people can walk right up to it to check out fine detail. This requirement pushes you toward using a large piece of film for the original exposure. The large piece of film will require a large relatively heavy camera surrounding it, which gets us into Factor 3: "How much weight can you carry to the subject?"
Annie Leibowitz goes to a portrait session with several assistants carrying her heavy Mamiya camera that exposes a 6 x 7 cm negative (4.5 times the area of a 35mm negative). Ansel Adams would pack his 8 x 10 inch camera into the Sierra with a mule. If you're the mule and your subject isn't in your home or photo studio, think about whether you'll have the energy to take any pictures after carrying around a particular camera and its accessories.
Different cameras work at different speeds. With the latest Canon or Nikon autofocus systems, you might be able to capture an unanticipated event on a soccer field. Ansel Adams could not have done this with an 8 x 10 view camera, which requires many minutes for setting up the tripod, focusing, stopping the lens down to taking aperture, closing the shutter, cocking the shutter, film loading, dark slide removal, and exposure. If your subject is a big mountain, you can probably afford to take your time making the image.
Now that we have the factors in mind, let's dive into the types of cameras available:
A camera won't do you much good unless you can buy film in the right size for it. Companies like Fuji and Kodak will generally make the same emulsion (film formulation) in a variety of sizes.
Almost every emulsion will be available in 35mm cartridges. The standard frame size for a 35mm camera is 24 x 36 mm.
Most emulsions are available in "120 size" roll film. There are many standard widths for 120 camera frames: 645, 6x6, 6x7, 6x8, 6x9, 6x12, and 6x17. These numbers are ostensibly in centimeters although in practice a 6x6 camera such as a Hasselblad will expose a 56 x 56 mm frame. Comparatively few emulsions are available in 220, which is the same as 120 except that you get twice as many exposures/roll (24 rather than 12 for 6x6; 8 rather than 4 for 6x17 panoramics).
If you need a larger negative than roll film, you must use sheet film. Standard American sizes are 4x5, 5x7, 8x10, and 11x14. The dimensions are in inches. The largest sizes are wonderful for those who do darkroom work because they can be contact-printed into final framable results, avoiding the degradation of an enlarger lens. However, there is very little emulsion choice in 11x14 and not too much in 8x10 or 5x7 either. Given the high quality of modern optics and film, for most applications these days, a 4 x 5 inch sheet of film is large enough. Therefore that's where most of the demand is and where you get the best choice of emulsions.
I'm not going to let my article on APS film and cameras serve as my repository for what I know about this format (somewhat smaller than 35mm). Despite the intriguing nature of spy cameras such as the Minox (Austin Powers used one to copy documents), film formats significantly smaller than 35mm are generally not useful for serious photographers.
View cameras are the most flexible cameras, usually made from a basic design that has not changed for over 100 years. You know the guy in the old time photo studio who photographs with his head under a cloth? He's using a view camera. Edward Weston? He took most of his best photos with an 8x10" view camera. All those luscious ads for food in magazines? Taken with view cameras.
A view camera is fundamentally a light-tight box with a slot at one end for a lens and a slot at the other for the film. You compose and focus your image on a groundglass, then displace the glass with a sheet of film in a film holder.
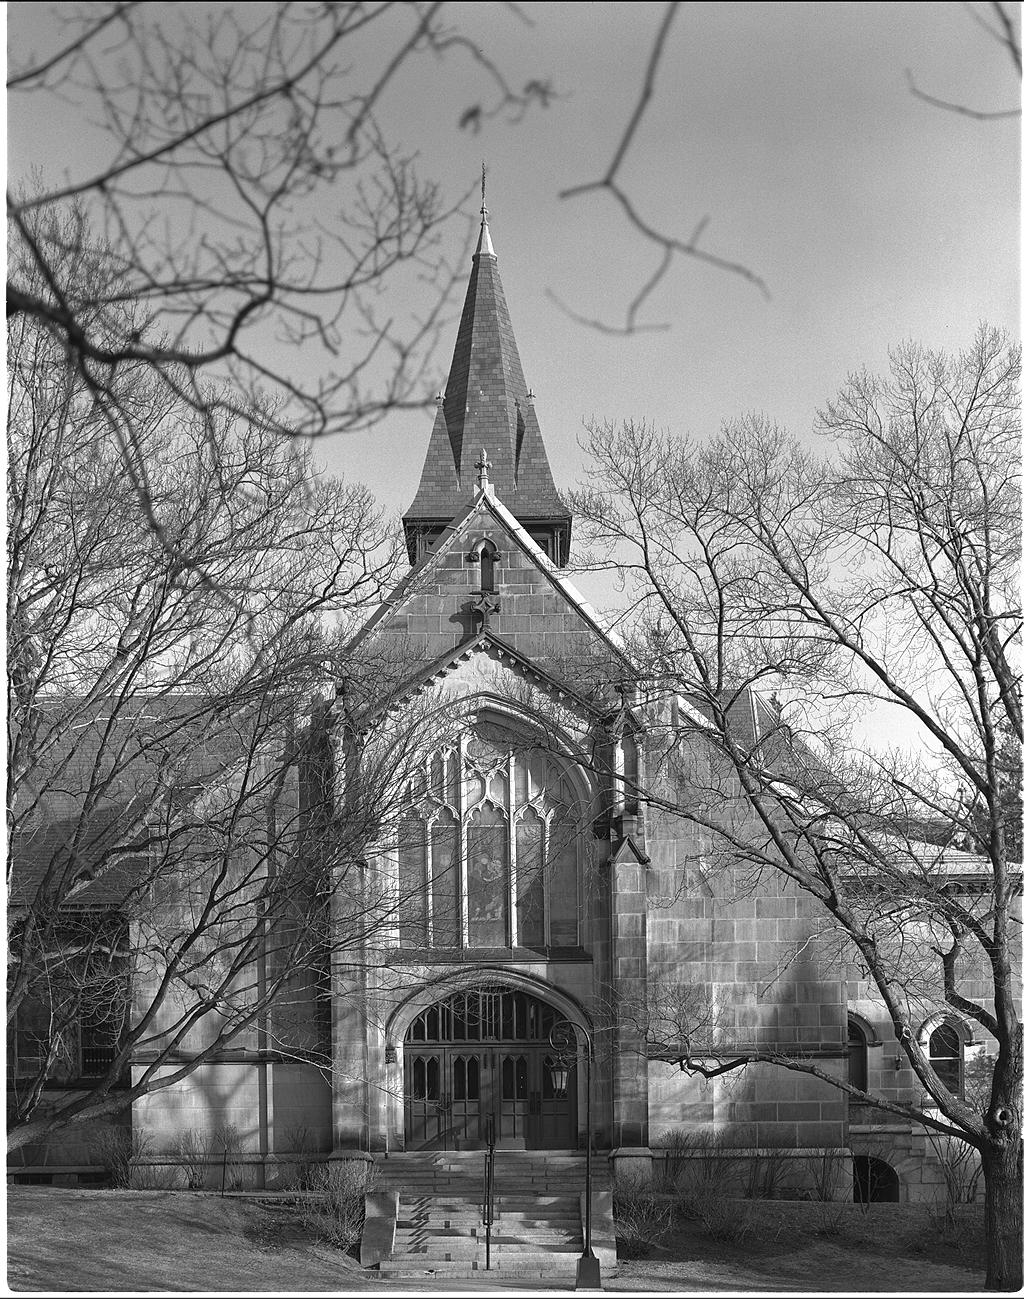 The lens and film aren't fixed parallel to each other. This opens up a
huge range of creative opportunities that are unavailable to most
photographers. For example, if you want to take a photo of a building,
the obvious thing to do is point the camera up towards the center of the
structure. However, this results in projecting the vertical exterior of
the building onto the angled film surface. The lines of the building
will converge towards the top of the frame. A view camera allows you to
keep the camera level with the ground and either shift the lens
up or the film down. The film is now "looking up" at the building
through the lens, but the film is still parallel to the building
exterior so lines don't converge.
The lens and film aren't fixed parallel to each other. This opens up a
huge range of creative opportunities that are unavailable to most
photographers. For example, if you want to take a photo of a building,
the obvious thing to do is point the camera up towards the center of the
structure. However, this results in projecting the vertical exterior of
the building onto the angled film surface. The lines of the building
will converge towards the top of the frame. A view camera allows you to
keep the camera level with the ground and either shift the lens
up or the film down. The film is now "looking up" at the building
through the lens, but the film is still parallel to the building
exterior so lines don't converge.
If you're taking a picture of rocks in a stream with a view camera, you can achieve sharper focus by tilting the lens forward a bit. This will get the Scheimpflug Rule working for you: the planes of the subject, the lens, and the film should all intersect in a line. You can achieve the same result by leaving the lens fixed and tilting the film standard back a bit. This will improve the focus and also increase the relative prominence of nearby rocks since they will be stretched out onto the film.
If you want to understand view cameras, you can start by reading B&H Photo's introduction to large format and the standard textbook on the topic: View Camera Technique. I provide some view camera sample images in my FlashPix References Images collection.
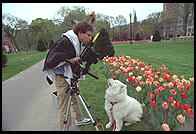
Above: the very first image that I made with a view camera, back
in 1981. I was a 17-year-old undergraduate at MIT taking an intro
photography course (the only one I've ever taken). We had old cheap
metal view cameras, loaded Tri-X, and developed the film and prints
ourselves.
A single lens reflex (SLR) is a camera in which the same lens is used for viewing and taking pictures. A mirror in the body directs the light from the lens up into a prism for viewing, then flips up out of the way just before an exposure is made. Note that this is not an exotic technology; the standard Nikon or Canon camera body is an SLR.
Suppose that the photographer has chosen an exposure of f/8 and 1/125th of a second. Here is how most SLRs work during exposure:
SLR manufacturers generally provide a range of interchangeable lenses. This works out nicely because changing the lens simultaneously changes the scene magnification on film and in the viewfinder. Unlike view cameras, it is tough to mix and match brands. Camera bodies and lenses are coupled mechanically and perhaps electronically in non-standard ways (partly to accomplish the exposure sequence detailed above). So a lens for a Hasselblad SLR won't fit a Rollei and a Canon EOS lens won't fit a Nikon body.
The best thing about an SLR is that what-you-see-is-what-you-get. If you've left the lens cap on, fitted a really long telephoto, attached a strange filter, you can see the effect in the viewfinder. This is also true for a view camera, but with an SLR the image is right-side up and available until a few milliseconds before the exposure.
One obvious problem with an SLR is weight. The prism on top of the body that lets you see a properly-oriented image is heavy. For medium-format SLRs, the prism is very heavy and is usually optional. If you don't mind looking down into the camera and seeing an image that is reversed left-to-right, you can use a lightweight metal viewing hood rather than a prism.
Another problem with the SLR is noise. The mirror is light but it has to be flipped up as fast as possible. This is noisy. With a medium-format SLR, the mirror is four times the size of a Nikon's and very noisy.
A final problem with an SLR is exposure latency. If you wait for the decisive moment and press the shutter, the camera doesn't take a picture until it has stopped down the lens and flipped up the mirror. This takes between 50 and 100 milliseconds for the average 35mm SLR.
Note that a few 35mm SLRs have been built with fixed semi-transparent mirrors called "pellicle mirrors". The Canon EOS line includes a cheap discontinued EOS RT model and an expensive current EOS-1 RS model. The RS's mirror sends one-third of the light to the viewfinder and two-thirds to the film. Thus the viewfinder is more than 1 f-stop dimmer than a standard camera and the film gets 2/3 f-stop less light than with a standard camera. Advantages are that the picture gets taken 6 ms after you press the shutter release, you retain your view of the subject at the exact moment of exposure, the motor drive can operate at a blistering 10 frames per second, and there is less vibration.
A twin-lens reflex has two lenses (the twin lens) and a mirror to bounce the light from one of them onto a ground-glass focusing screen (the reflex). Lacking a prism, a TLR tends to be lightweight. Since the mirror remains fixed at all times, a TLR tends to be quiet and exposure lag is minimal. TLRs are mechanically very simple. Consider that in an SLR the lens must have an automatic diaphragm that remains open until the instant before exposure, then stops down quickly to taking aperture. With a TLR, there are separate taking and viewing lenses and therefore the aperture knob can directly open and close the diaphragm blades.
TLRs suffer from potential misalignment, e.g., when the image is focussed on the ground glass by the viewing lens, it might not be focussed on the film plane by the taking lens.
TLRs suffer from parallax. The viewing lens is higher than the taking lens and captures a different image. If the image is a mountain 20 miles away, the three inches of separation won't be significant. However, you can forget about doing macro work and you might get interesting framing errors if you're close to the subject.
The classic collectible TLR is the Rolleiflex, which takes 120 and 220 roll film. Though there is no technical reason why TLRs couldn't be built for other film sizes, virtually all make 6x6 cm images on 120 film. The TLR that poor photography students use is the Yashica 124 (see photo at right; I took it during my junior year at MIT). The TLR that wedding photographers use is the Mamiya because you can change the lenses. The only TLRs currently in production are the Rolleiflex, which is priced from $3000 and sold to collectors, and various Chinese-made inexpensive toys (e.g., the Seagull for about $130). Used Mamiyas, Rolleiflexes, and Yashicas are common, however, and quite inexpensive. They are great for people taking darkroom classes who don't have much money but want a larger easier-to-handle negative.
The simplest lens-shutter cameras are like my Fuji 617. Fuji took a view camera lens, with its shutter, and glued it to a rigid body that holds roll film. You lose the perspective control of a view camera but the result is a much simpler and more compact camera. Focusing on the simplest lens-shutter cameras is done by "guestimation"; the focusing ring on the lens is marked in feet and meters. You try to figure out how far away your subject is and then turn the ring accordingly.
Most SLRs have focal-plane shutters. After all, if you're going to buy 10 lenses and one body, it makes more sense to put an expensive shutter only in the body. But if you've got a camera with a permanently affixed lens, it makes just as much sense to put the shutter in the lens. In fact, if a lens is very small, as with a consumer's point and shoot camera, a between-the-lens shutter can often be very small and therefore cheaper and faster than a focal-plane shutter that must cover the entire exposed film area.
With a lens-shutter or rangefinder camera, you can't look through the lens. You view the image through a separate optical viewfinder. As with the TLR, the image on film will be a bit different than what you viewed due to parallax: the viewfinder isn't exactly aligned with the lens.
It turns out that people aren't very good at estimating distance precisely. So companies began putting military rangefinders into lens-shutter cameras, coupled to the lens and the viewfinder. The photographer turns a ring on the lens until two superimposed images are aligned in the viewfinder.
Modern lens-shutter cameras tend to have some sort of autofocus mechanism.
Without the mirror and prism, lens-shutter cameras can be much lighter and more compact than an SLR using the same film format. Mamiya and Fuji roll-film rangefinders are actually lighter than the big Nikon and Canon 35mm SLRs, despite the fact that roll-film cameras produce a negative that is four times the size.
With no mirror to slap, lens-shutter cameras are also much quieter than SLRs. The United Nations, for example, requires that photographers use Leica 35mm rangefinder cameras to record events.
Any camera can be a panoramic camera. You need only take a negative to a professional laboratory and say "make me a long skinny print from this portion of the negative". Or take a negative to any lab and say "make me a big print from this negative". Once you get home, use a pair of scissors to trim the big print until it is long and skinny and contains the subject matter of interest. This may sound absurd but it is in fact how most 35mm "panoramic mode" cameras operate. They use the same lens as in normal mode and mask off the top and bottom of the frame. Then the laboratory knows that you wanted a long skinny print and it is obvious which portion of the neg to print (i.e., the non-blank portion). APS cameras do the same thing except that they record the panorama mode magnetically on the back of the film. The entire frame is exposed and you could later change your mind and ask the lab to print the whole frame.
You won't get very high image quality if you print from only a tiny portion of a tiny negative. But that doesn't mean you need a true panoramic camera. You could just use a big view camera and bring the resulting 4x5, 5x7, or 8x10 sheet of film into a pro lab and tell them to print only the central portion.
If that seems like a waste of film and effort, then the Fuji 617 that I own is for you. Fuji takes one of their 5x7 view camera lenses and attaches it to a body that handles 120 and 220 roll film. So the photographer is freed from the bulk of the 5x7 view camera, from the drudgery of loading sheet film into film holders, and from having to spend $6 per exposure on film and processing (instead it is perhaps $3 per exposure).
Panoramic cameras don't have the perspective correction flexibility of the view camera from which they were cut down. This is very annoying if you're trying to capture architecture in a city. Panoramic cameras don't have the close-focus capability of view cameras. This is annoying if you want to include a person's face prominently in your image. Panoramic cameras can be unbelievably expensive compared to the view cameras from which they are derived. For example, Linhof makes a 617 camera similar to my Fuji. A Schneider 72mm lens for the camera is $4000. The same lens ready for use on any view camera was $1500 (in December 1998).
There are panoramic cameras that do things you could never do with a view camera and cropping. These have rotating lenses that capture up to 360 degrees onto long strips of film, e.g., the $650 Spinshot camera makes 7 frames on a 36-exposure roll of 35mm film. The Noblex is the standard rotating-lens 120 roll-film camera. It captures 150 degrees on a 6x12 frame.
I'm not really an expert on panoramic photography but I think that the main advantage of the fixed lens camera is simplicity. A camera with a rotating lens can produce very strange results if the lens does not rotate smoothly. The big advantage for the rotating lens cameras, in addition to wide field of view, is that they are free of the edge distortion and light falloff that you get with wide angle lenses.
One thing to keep in mind is that if your panoramic camera produces an image that does not fit into a 4x5 enlarger, you won't be able to print images yourself in a darkroom and will be forced to used a professional laboratory where they have an 8x10 enlarger. Note that 6x12 fits in a 4x5 enlarger but 6x17 does not.
This chapter is meant to provide background, not purchasing advice. I try to keep some current practical advice in the following articles: