Filters
by Philip Greenspun; created 1997
Site Home : Photography : Filters
You can be a great photographer without ever owning a filter. Many of the things that were traditionally done with filters can be done better post-exposure with Photoshop.
There are basically four filters for B&W photography: red, orange, yellow, and green. If all of the items in your photograph were different shades of gray, then putting these filters over the lens wouldn't do anything except require an exposure adjustment. However, the real world usually comes with colored objects. Colored filters affect the relative prominence of different colored objects.
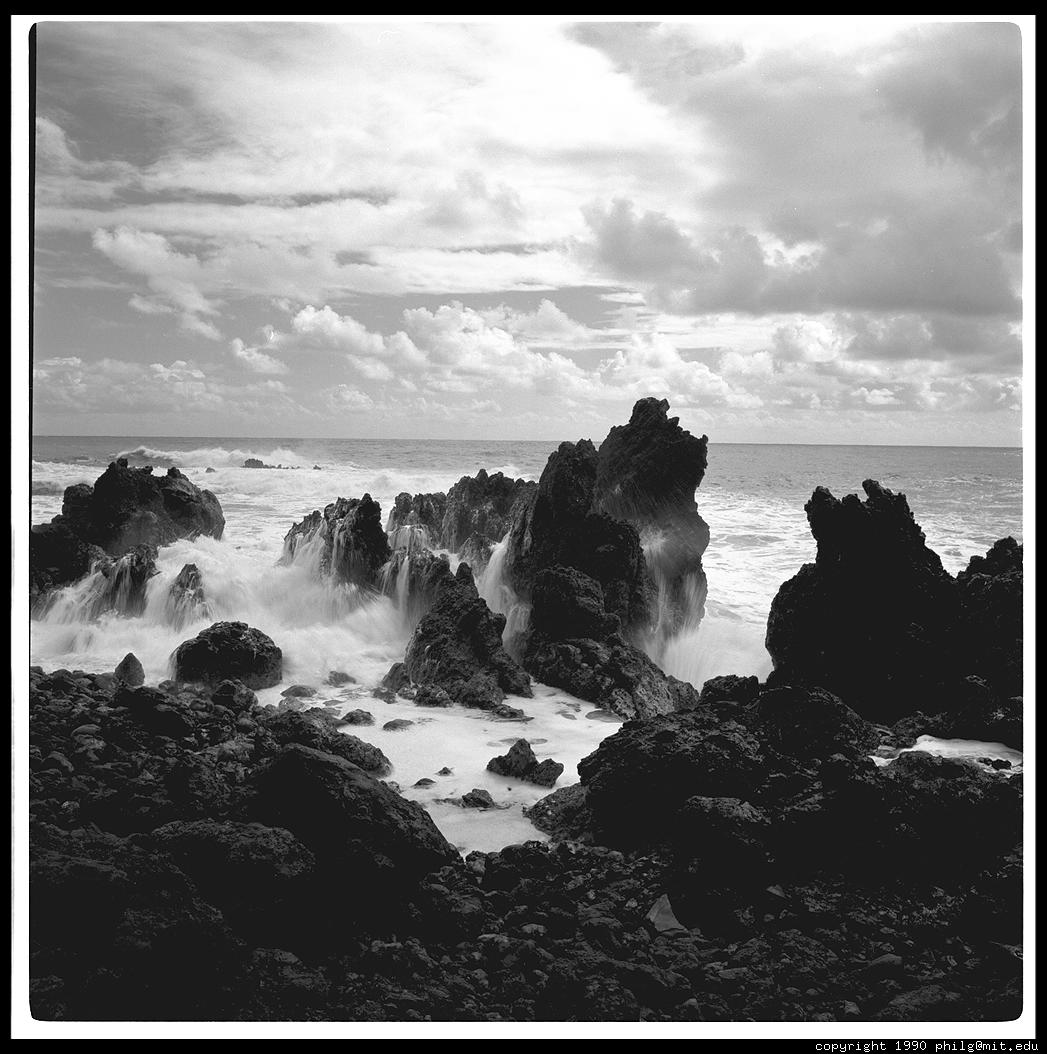
Concrete example: my favorite filter is the least subtle, the red one. Except here in Boston, the sky is typically blue. Clouds are typically white. Unfortunately, on B&W film both are roughly the same intensity so you end up with a white sky. There is no contrast between clouds and sky. A red filter, however, darkens blue things more than it darkens white things. So now the sky shows up on the final print as a rich black and the clouds are still white. Most B&W landscape photos are taken with a filter of some kind.
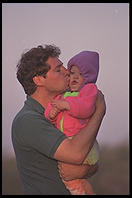
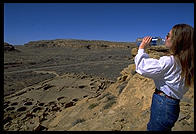
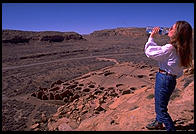
If you want to be a hardcore advertising photographer then you need to buy a Minolta color temperature meter and a big pile of color compensation filters. Film is designed for outdoor photography at midday. But sunlight around sunset is much redder than midday light and skylight that illuminates open shade is much bluer than midday sunlight. If you want to erase these differences, then you need to carry warming and cooling filters. Personally, I am too lazy for this. I hope that (1) the results of the unusual light will be aesthetic and interesting, (2) modern film, esp. Fuji Reala, will compensate, (3) if it was negative film then the printing lab can compensate, (4) I can always fix the color in PhotoShop.
Photo at right: my cousin Douglas at sunset, holding our second cousin Julia. I could have used a cooling filter to bring the colors back to neutral but then it wouldn't have been so warm.
Tiffen makes a highly specialized filter that they call "enhancing". Here's what they say about it:
Creates brighter, more saturated reds, rust browns and oranges on film, with minimal effect to other colors. Made of didymium glass, it is ideal where red, brown and orange subjects should be enriched. Old rustic barns, flowers, earthtone rock formations, strawberries and tomatoes are some of the many possibilities in which this filter can improve color saturation. Most popular for capturing dramatic images of autumn. Changes in foliage color are enhanced for improved fall landscapes and picture postcard scenes. For cameras with manual light metering, 1/2 to 1 stop compensation is required.
I own one but I'm usually too lazy to really play with it. Here are a few examples (sadly they are all kind of bad photos):
 before |
 after |
 before |
 after |
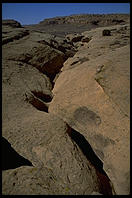 before |
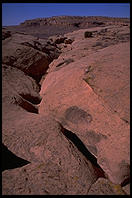 after |
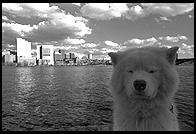
Polarizing filters can be used with color or black and white film to reduce reflections. This can be essential when photographing through glass or when trying to capture an image of something floating beneath the surface of a lake or pool. Glare off water and leaves tends to be white. Removing it with a polarizer thus results in more apparently saturated colors. In the old Kodachrome days, a lot of photographers kept a polarizer over the lens at all times. With modern more saturated film, notably starting with Fuji Velvia, this is an obsolete practice. Colors are plenty saturated these days to satisfy almost everyone and the 1-2 f-stop loss of light from polarizing is painful.
Polarizers come in two pieces, the front element of which rotates so that you can change the angle of polarization. Because of this extra complexity, polarizers degrade image quality more than other filters. If you have a modern SLR (built since 1980) then it probably contains a beam-splitter to send some light to metering photo diodes. A standard "linear polarizer" may cut off almost all the light going to the metering diodes, depending on its relative angle. You should buy a "circular polarizer" so that your metering system has some chance of remaining accurate.
Nikon makes some of the best polarizers because the front elements are larger than the rear. You can thus use them with 20mm and wider lenses without fear of vignetting (darkening of corners due to occlusion of the image by the polarizer ring).
If you stack filters or otherwise put too much stuff in front of your lens, you will eventually get vignetting. Here's an embarrassing photo of mine where I had the hood for an 80mm normal lens on a 50mm wide-angle lens. I was in Kauai on the famously photogenic Napali Coast. I had a Rollei 6008 6x6cm camera. So I should have been able to do better.

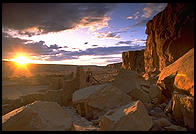
It was probably the wrong focal length anyway; I think the scene looks a lot better with the 250mm lens:
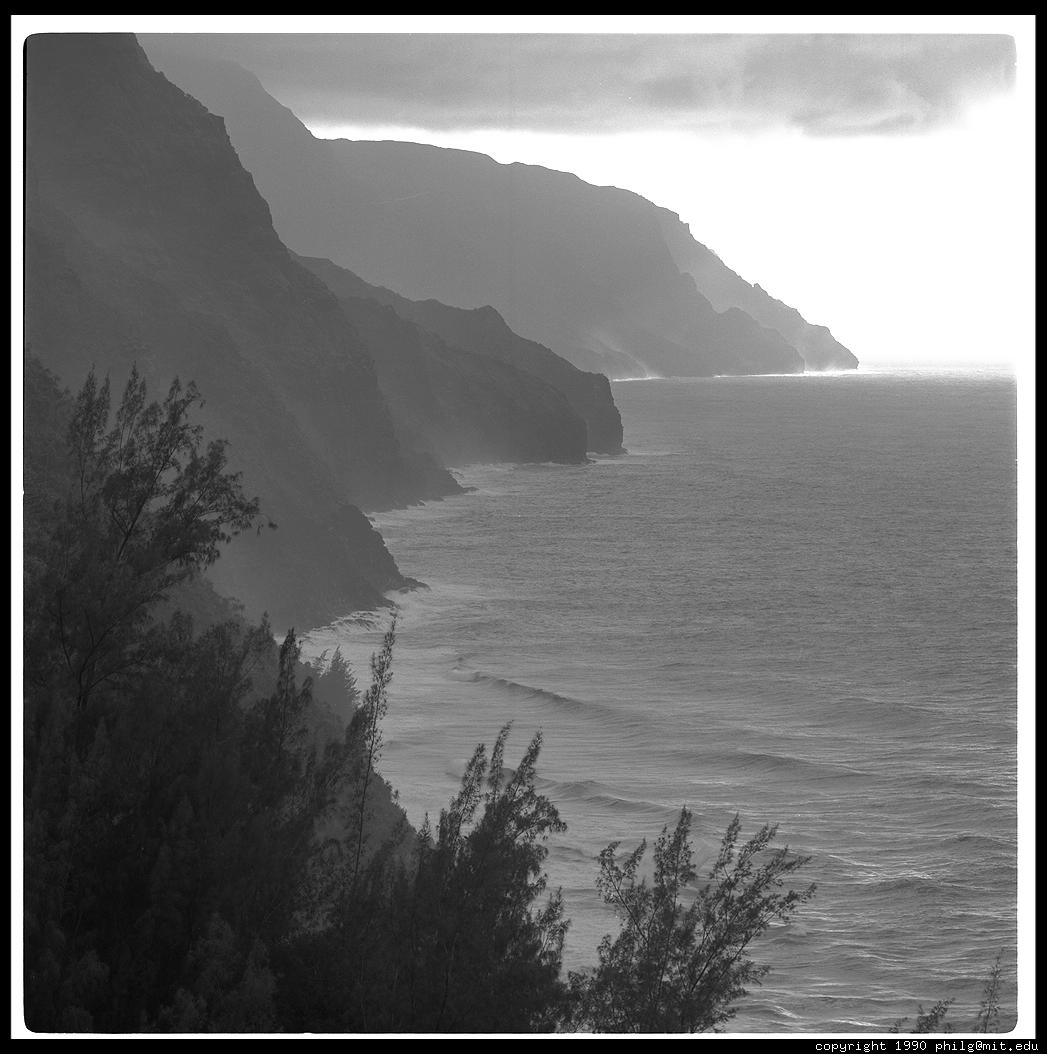
I think in the upper photo, I was trying to capture some cloud action but the photo is useless because too much of it is black.
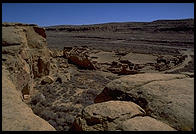
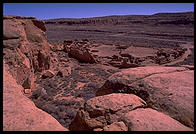
The sun is very bright; you heard it here first. Film can only handle a limited range of contrast. In a sunset photo, if you expose to capture color in the bright sky, the landscape will be black. If you expose to capture detail in the landscape, the sky will be washed out and white. You could take two pictures, 3 f-stops apart, and then combine the foreground from one with the sky from the other in PhotoShop. You could use a big flash with a warming filter over the tube to light up the foreground. Or you could stick a graduated neutral density filter over your lens. This is 2 or 3 f-stops darker on the top as on the bottom. So it equalizes the illumination of the land and sky.
The filter's transition between dark and light is usually smooth and you want to place this transition region around the horizon. The best graduated filters are square or rectangular. This lets you slide the filter up and down until the graduated region in correctly positioned for your composition. Tiffen makes some especially good glass graduated ND filters. I use them in a Cokin P holder (see below).
There is a school of thought about portraiture that says old-timey photographers with crummy lenses took more flattering photos than modern photographers with their ultra-sharp ultra-high-contrast lenses. If you really want to do this right, you can get a soft-focus lens, covered briefly in this portrait photography tutorial. If you just want to fuzz up your pictures a bit, there are a variety of products that you can get to stick on the end of your lens. The cheapest is a nylon stocking, obtainable at any drugstore. The most expensive is probably a Zeiss Softar, a classic screw-in filter with little "sub-lenses". You probably can't go wrong with a Softar, though there are cheaper substitutes. Tiffen would probably tell you that their Soft/FX filter is even better than the Zeiss. I don't really buy into the soft-focus boudoire look and I own a Canon 135 soft-focus lens so I'm not really tempted to experiment.
If a soft filter is one that imitates a lens defect, then a center-spot filter is one that fixes lens defects. Most super-wide lenses, especially for large format cameras, are brighter in the center of the frame and darker at the edges. If you don't want to see dark corners then you just get a filter that is dark in the center and light at the edges. I use one with a Fuji 617 camera, which uses a 5x7" view camera lens.
Wide angle lenses for 35mm cameras usually have some light falloff as well,
but it is better corrected and you can often eliminate it merely by stopping down
to f/8 or f/11.
The most common type of filter is the screw-in glass variety. These screw into the front of your lens. The only real problem with these is that they are sometimes hard to get back out. Professionals carry little plastic widgets called "filter wrenches" to remove filters whose threads have welded to the lens. Filters really ought to be bayonet-mount and they are on high grade 6x6cm cameras like Hasselblads and Rolleis. (Unfortunately these bayonet filters are about the same price as cheap lenses for 35mm SLRs.)
Kodak has sold gelatin filters for years under the "Wratten" brand name. Professionals with view cameras would typically tape these to their lenses, usually on the inside of the camera. Gel filters are cheap and apparently optically very good but they don't last very long if you handle them.
The modern equivalent of gel filters is the Cokin system and its imitators. You buy a holder and then any number of 3 or 4" square plastic filters. You can stick three or four at once in front of your lens for very strange effects. I'd rather do it all in PhotoShop, personally... Anyway, the Cokin P holder is kind of a standard and has its uses. I carry one in my bag with the Tiffen grad ND filter.
Neurotics use B+W or Nikon-brand filters. Tiffen is about half the price and probably just as good (cinematographers use Tiffen on their $10,000 lenses to make their $100 million movies). Nobody seems to like Canon-brand filters.
I don't think a beginner should buy any filters, except possibly a UV filter to protect an expensive lens. Thinking about filters is a distraction when you should be thinking about light, composition, and subject. After you've burned 500 rolls of film, then it might be time to think about filters. (This doesn't apply to B&W landscape photographers, who typically will need a couple of filters very quickly.)
Here's some data courtesy of Tiffen...
(Note: Ortho and Pan refer to two types of black & white film, orthochromatic and panchromatic. Any consumer emulsion these days will be panchromatic ("responding to all colors of light"), which is why you see names like "Tri-X Pan".)
| f Stop Increase | f Stop Increase | |||||
|---|---|---|---|---|---|---|
| Ortho | Pan | |||||
| Filter No. | Color or Name |
Suggested Uses | Daylight | Tungsten | Daylight | Tungsten |
| 6 | Yellow 1 | For all black and white films, absorbs excess blue, outdoors, thereby darkening sky slightly, emphasizing the clouds. |
1 |
²/3 |
²/3 |
²/3 |
| 8 | Yellow 2 | For all black and white films, most accurate tonal correction outdoors with panchromatic films. Produces greater contrast in clouds against blue skies, and foliage. Can be used for special effects with color film. |
1 ¹/3 |
1 |
1 |
²/3 |
| 9 | Yellow 3 | Deep yellow for stronger cloud contrast. |
1 ¹/3 |
1 |
1 |
²/3 |
| 11 | Green 1 | For all pan films. Ideal outdoor filter where more pleasing flesh tones are desired in portraits against the sky than can be obtained with yellow filter. Also renders beautiful black and white photos of landscapes, flowers, blossoms and natural sky appearance |
- |
- |
2 |
1 ²/3 |
| 12 | Yellow | "Minus blue" cuts haze in aerial work, excess blue of full moon in astrophotography. Recommended as basic filter for use with Kodak Aero Ektachrome Infrared. |
1 ²/3 |
1 ¹/3 |
1 |
²/3 |
| 13 | Green 2 | For male portraits in tungsten light, renders flesh tones deep, swarthy. Lightens foliage, with pan film only. |
- |
- |
2 ¹/3 |
2 |
| 15 | Deep Yellow | For all black and white films. Renders dramatic dark skies, marine scenes; aerial photography. Contrast in copying. |
2 ¹/3 |
1 ²/3 |
1 ²/3 |
1 |
| 16 | Orange | Deeper than #15. With pan film only. |
- |
- |
1 ²/3 |
1 ²/3 |
| 21 | Orange | Absorbs blues and blue-greens. Renders blue tones darker such as marine scenes. With pan film only. |
- |
- |
2 ¹/3 |
2 |
| 23A | Light Red | Contrast effects, darkens sky and water, architectural photography. Not recommended for flesh tones. With pan film only. |
- |
- |
2 ²/3 |
1 ²/3 |
| 25 | Red 1 | Use with pan films to create dramatic sky effects, simulated "moonlight" scenes in midday (by slight under-exposure). Excellent copying filter for blueprints. Use with infrared film for extreme contrast in sky, turns foliage white, cuts through fog, haze and mist. Used in scientific photography. |
- |
- |
3 |
2 ²/3 |
| 29 | Dark Red | For strong contrasts; copying blueprints. |
- |
- |
4 ¹/3 |
2 |
| 47 | Dark Blue | Accentuates haze and fog. Used for dye transfer and contrast effects. |
- |
- |
2 ¹/3 |
3 |
| 47B | Dark Blue | Lightens same color for detail. |
2 ²/3 |
3 |
3 |
4 |
| 56 | Light Green | Darkens sky, good flesh tones. With pan film only. |
- |
- |
2 ²/3 |
2 ²/3 |
| 58 | Dark Green | Contrast effects in microscopy, produces very light foliage. |
3 |
2 ¹/3 |
3 |
3 |
| 61 | Dark Green | Extreme lightening of foliage. |
- |
- |
3 ¹/3 |
3 ¹/3 |
| 87 | - | For infrared film only, no visual transmission. |
- |
- |
- |
- |
| 87C | - | For infrared film only, no visual transmission. |
- |
- |
- |
- |
| Neutral Density |
All Film Types Color or Black and White |
For uniform reduction of light with high-speed films for still and movie cameras. No change of color value. Ideal for outdoor video. |
various |
various |
various |
various |
| Polarizer | All Film Types Color or Black and White |
Eliminates surface reflections, unwanted glare or hot spots from any light source. The only filter that will darken a blue sky and increase color saturation. |
2 |
2 |
2 |
2 |
Note: Circular Polarizers are used on cameras with beam-splitting metering systems.
| Filter No. | Film Type | Lighting | f Stop Increase | Suggested Uses |
|---|---|---|---|---|
| CLEAR | All | All |
- |
Optical glass lens protection with no color shift |
| SKY 1A | Daylight | Daylight |
- |
Use at all times, outdoors, to reduce blue and add warmth to scene. Also in open shade. |
| HAZE 1 | Daylight | Daylight |
- |
Reduce excess blue caused by haze and ultraviolet rays. Ideal for mountain, aerial and marine scenes. Transmits 29% at 400nm. |
| HAZE 2A | Daylight | Daylight |
- |
Greater ultraviolet correction than Haze #1 filter and adds some warmth to the visible colors. Transmit 0% at 400nm. |
| UV15 | Daylight | Daylight |
- |
Haze filter. Transmit 19% at 400nm. |
| UV16 | Daylight | Electronic flash Daylight |
- |
Reduces excessive blue in electronic flash, also may be used for haze correction. Transmits 13.5% at 400nm. |
| UV17 | Daylight | Daylight |
- |
Greater haze correction, reduces blue in shade. Transmits 3% at 400nm. |
| 80A | Daylight | 3200°K floods |
2 |
Converts daylight film for use with 3200°K lamps. |
| 80B | Daylight | 3400°K floods |
1 ²/3 |
Converts daylight film for use with 3400°K floods. |
| 80C | Daylight | Clear flash |
1 |
For use with clear flash and daylight color films. |
| 81 | Daylight | M2 flash |
¹/3 |
Yellowish, warming filter. |
| 81A | Daylight Type B |
Electronic flash 3400°K floods |
¹/3 |
Balances daylight films to electronic flash. Corrects Type B films for use with 3400°K lamps. Prevents excessive blue. |
| 81B | Daylight Type B |
Electronic flash 3400°K floods |
¹/3 |
Warmer results than 81A. |
| 81C | Type A, B | Clear flash |
¹/3 |
Permits the use of clear flash lamps. |
| 81EF | Type A (3200°K) |
M2 flash |
²/3 |
For any 650°K drop, flash lamps with Ektachrome Type B. |
| 812® | All Color Films | Match to film |
¹/3 |
Warm tint improves skin tones. Removes excess blue. |
| 82 | Daylight | Daylight |
¹/3 |
For any 100° increase in Kelvin temperature for color renderings. |
| 82A | Type A Daylight Negative |
3200°K floods Early AM, late PM 3400°K floods |
¹/3 |
With Daylight and Daylight Negative films use in early AM or late PM to reduce the excessive red of the light. When using Type A (3400°K) films under 3200°K lamps. |
| 82B | Type B | 3200°K floods |
²/3 |
For cooler results. |
| 82C | Type A | 3400°K floods |
²/3 |
For cooler results or when using 3200°K lamps. |
| 85 | Type A | Daylight |
²/3 |
Converts Type A to Daylight. |
| 85N3 | Type A | Daylight |
1 ²/3 |
85 combined with ND 0.3 converts Type A film to Daylight. Permits use of larger apertures. |
| 85N6 | Type A | Daylight |
2 ²/3 |
85 combined with ND 0.6 converts Type A film to Daylight. Permits use of larger apertures. |
| 85N9 | Type A | Daylight |
3 ¹/3 |
85 combined with ND 0.9 converts Type A film to Daylight. Permits use of larger apertures. |
| 85N1.0 | Type A | Daylight |
3 ²/3 |
85 combined with ND 1.0 converts Type A film to Daylight. Permits use of larger apertures. |
| 85POL | Type A | Daylight |
2 ¹/3 |
85 combined with Polarizer. Converts Type A film to daylight with all advantages of Polarizer. |
| 85B | Type A, B | Daylight |
²/3 |
Converts Type B film to daylight. |
| 85BN3 | Type B | Daylight |
1 ²/3 |
85B combined with ND 0.3 converts Type A film to Daylight. Permits use of larger apertures. |
| 85BN6 | Type B | Daylight |
2 ²/3 |
85B combined with ND 0.6 converts Type A film to Daylight. Permits use of larger apertures. |
| 85BN9 | Type B | Daylight |
3 ¹/3 |
85B combined with ND 0.9 converts Type A film to Daylight. Permits use of larger apertures. |
| 85BN1.0 | Type B | Daylight |
3 ²/3 |
85B combined with ND 1.0 converts Type A film to Daylight. Permits use of larger apertures. |
| 85BPOL | Type B | Daylight |
2 ¹/3 |
85B combined with Polarizer. Converts Type A film to daylight with all advantages of Polarizer. |
| 85C | Daylight Tungsten |
Daylight |
¹/3 |
Helps prevent overexposure of blue record layer. For warmer results with daylight film. For cooler results than with 85B for Tungsten film. |
| CC30R | Daylight | Daylight |
²/3 |
For underwater photography, to correct color. |
| FL-B® | Type B | Fluorescent |
1 |
Eliminates the deep blue-green cast ordinarily resultant from shooting color films with fluorescent lights. |
| FL-D® | Daylight | Fluorescent |
1 |
Eliminates the deep blue-green cast ordinarily resultant from shooting color films with fluorescent lights. |
| Neutral Density |
All Film Types Color or Black and White |
All light sources |
various |
For uniform reduction of light with high-speed films for still and movie cameras. No change of color value. Ideal for outdoor video. |
| Polarizer | All Film Types Color or Black and White |
All light sources |
2 |
Eliminates surface reflections, unwanted glare or hot spots from any light source. The only filter that will darken a blue sky and increase color saturation. |
Note: Circular Polarizers are used on cameras with beam-splitting metering systems.