Camera Bags
by Philip Greenspun; revised August 2018
Site Home : Photography : Camera Bags
The great thing about camera bags is that no matter how much you spend, you will never be at peace with one camera bag. It will always be too big, too small, not padded enough to check through, not slim enough to carry on, ... . You may be sure only of the following:
The best way to shop for a camera bag is to gather up all of the gear that you think you'll be likely to use on a typical project and walk into a well-stocked camera store. Budget at least an hour to find the bag that best fits the gear collection.
A holster-style bag is sized precisely for one camera body attached to a particular lens. The ThinkTank web site is a good illustration of the possibilities. Tamrac is an alternative high quality supplier. The holster is not used in between photographs; the camera needs to be kept out and ready. The holster is used to protect the camera/lens between projects and when the camera/lens is tossed into a standard backpack or duffel bag.
A small bag holds a camera body, three lenses, and maybe a flash. Typically these are rectangular bags with a shoulder strap. Perhaps the classic example is Domke, the perennial favorite of photojournalists. I find this kind of bag good for leaving under a table at a wedding reception, but not great for access to gear while I'm in motion.
A minor improvement on the standard design is the addition of a waist belt that can be tucked back away when not in use. The waist belt, pioneered with the venerable Tamrac 709, stabilizes the bag on a long walk.
Some designs worth investigation:
 Once a shoulder bag becomes large enough to hold enough equipment to
cover a wedding or an entire medium format system, it becomes awkward
to carry and difficult to dig through. Consider a backpack. The best
big camera bag that the author has used is the LowePro SuperTrekker
AW backpack.
Once a shoulder bag becomes large enough to hold enough equipment to
cover a wedding or an entire medium format system, it becomes awkward
to carry and difficult to dig through. Consider a backpack. The best
big camera bag that the author has used is the LowePro SuperTrekker
AW backpack.
The SuperTrekker is a big frameless backpack divided up with foam. It has only one level so you don't have to figure out what goes on top of what, as with big shoulder bags. I've stuffed this one bag with two Canon EOS bodies, five EOS lenses (including a big telephoto L zoom), plus a Fuji 617 monster, lots of accessories, a tripod and film (it was that long ago!). The bag was not quite full. You can configure the case to hold a 600/4, a 300/2.8, a folding view camera, or maybe even all three.
Back before I got old/wise enough to hire assistants, I found the SuperTrekker very comfortable to wear and it had thoughtful and clever design features that took years to appreciate fully. The SuperTrekker can be a little tight for putting in an airline overhead bin, though a couple of times I checked it with no ill results.
The tripod case on the back is worth mentioning. It separates from the backpack if you wish to carry it separately, is big enough for a Manfrotto/Bogen 3021 and ballhead, and is well padded with foam.
If you are caught in the rain with the bag, unfurl the built-in rain fly.
The SuperTrekker is too big and heavy to carry while taking pictures and, even if you force an assistant to wear it, getting lenses out while the backpack is in a vertical position is not easy. LowePro makes some smaller backpacks that are worth investigating. The Rotation 360 from ThinkTank is perhaps the most interesting idea in photo backpacks. The lower part of the pack can be swiveled around to your front temporarily. It opens at the top so that you can conveniently change lenses while standing and wearing the rest of the pack on your back.

I asked Peter Menzel (interview) to compare a LowePro to the ThinkTank backpack that he had been using:
The Lowepro Vertex 200 AW held the following: two Canon 5D bodies with vertical grips and lenses attached; the 16-35mm, 24-70mm and 100-400mm lenses; 2 Canon flashes; Bogen table top tripod; Minolta flash meter; soft case with extra battery, charger and 10 CF cards; headlamp and maglite; 15" notebook computer and charger. As an all-in-one backback--for photographic missions requiring airplane travel or complex shoots where I need more lenses and gadgets--it doesn't have the room. For my needs, the Lowepro Vertex 300 AW would probably be more appropriate.
The Vertex 200 backpack is rugged and well thought-out. It looks waterproof, although I wonder how the newfangled waterproof zippers will hold up over the years. I like the waistband and shoulder straps: the harness system offers good support for hiking with minimal equipment. It has good straps for attaching a bigger tripod too.
I normally use a Thinktank Airport Acceleration backpack, which, in addition to the equipment listed above, holds a 70-200mm lens, a 100 macro, and an infared remote receiver and trigger. The laptop slot is less padded than the Lowepro, and the harness system is not as good. I would take the Thinktank for transporting gear at airports, taxis and for moving fragile equipment around. The Lowepro would be better for backpacking and rougher assignments where I need fewer lenses.
-- Peter Menzel
For about $130 you can get a waterproof, dustproof, indestructible plastic hard case. It will hold a moderate array of equipment and look very nice sitting in your basement.
If you're going to be spending a long time in a hostile environment, e.g., a sailboat, one of these might be worthwhile, but they are very user-unfriendly. If you can't get to your equipment, you probably can't take a very good picture. A Pelican or Zero Halliburton case is nice if you are collecting cameras but not very practical if you want to use them.
You might imagine that a hard case like this would be ideal for check-through airline travel. However, the last thing that you want is a rigid case transmitting all the shock directly to your equipment.
Suppose that you need to check or FEDEX lighting equipment and larger cameras/lenses and then, once you've arrived on location, work out of the shipping container. You need an "air case". These are made with a rigid plastic core, strong enough to support this 200 lb. photographer. The core is made of shock-absorbing foam and then it is wrapped inside and out with more shock-absorbing foam. A final boon of an air case system is that all of this foam functions much as the foam around a picnic cooler. This protects gear from temperature extremes (though remember not to put film in checked luggage; airports use much higher strength X-rays on checked bags than carry-on). If you don't want airport baggage handlers opening your case, you can use a TSA-approved luggage lock on the zippers. Each case comes with a wrapped-foam divider system that is adjustable with Velcro. You have to budget a couple of hours to cut up the dividers to suit your goals.
There are three major brands of air cases: Lightware, Tamrac, and Tenba. I've had good experiences with six or seven different Tamrac bags, but have never tried their "protective hard cases." I have a Tenba case and the dividers come from the factory with sewn-in Velcro. It works perfectly. My experience with the Lightware case:
Second opinion: I once asked a clerk at Calumet what the difference between Lightware and Tenba was (they had both on display). She said "the Lightware sucks".
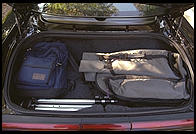
If you're a gearhead, you'll probably end up with a camera bag too big to carry around an art museum or a city. One effective strategy is to leave the bag in the car trunk and use a photo vest to carry what you need for a specific sub-project. Some photo vests have sufficiently large pockets to hold a 70-200/2.8 zoom lens, but none alas have pockets large enough for a mid-sized body with mid-sized lens attached.
The main problem with photo vests is that they make your neck hurt, but they are still more comfortable than most shoulder-strap bags. Plus your equipment is much more accessible.

Nikon made an interesting vest they called "Vestrap", which is sometimes available on the used market. The Vestrap has two little runt strapettes that you hook to your camera and then clip to the vest. The weight of the camera you're using then becomes part of the vest weight as well. The vest looked beautifully tailored, at least by computer nerd standards, and the pockets were large enough to hold 70-200/2.8 lenses or second bodies. I tried this vest for a month in Italy and didn't like it. First, the pockets aren't padded on the outside so if I sat down or took the vest off, the lenses took a lot of hard knocks. Second, I quickly discovered that a neoprene strap distributed the weight of a camera more comfortably than the Vestrap collar. Third, when you have the camera clipped in, it is difficult to take the camera or the vest off. You become inextricably linked to the vest and your equipment. I thought it was a reasonably good vest for covering a photojournalism assignment where you're going to be on your feet and focused on photography for a few hours. However, I preferred living out of an older Tamrac vest.
If you find yourself melting in the summertime in that photo vest and/or it won't hold your big lenses, try a belt system. The pioneer in this product category was Kinesis. I used a Kinesis system to cover MIT's 1998 graduation and found that a Canon EOS-5 body with vertical grip plus 70-200/2.8L lens all fit into one of the pouches with the enormous 70-200's plastic sunshade attached. I ran into Charlie Krupa, an AP News photographer, at the MIT event. He noticed my Kinesis belt and pointed to his own: "don't you just love this system?"
More fruits of the Kinesis belt system: Head of the Charles 1998.
The thin straps that come with camera bodies are good for keeping a tight leash on your equipment. If you don't mind a bit of stretch, thick neoprene straps distribute the weight of a camera much more comfortably around your shoulder. The Tamrac "boomerang" strap is a good example of the maximum in width and comfort. I was a big fan of the Tamracs because the same plastic connectors can be used to switch the camera into a (discontinued) Tamrac "Action Strap" in about 20 seconds. The Action Strap was a clever contraption that has the camera hang down from your neck against your chest and a neoprene belt with a hole in the middle comes around your waist to sit over the lens. This presses the camera up against your chest so that you can ride a horse, for example, without getting battered by your camera. When the time comes to snap a picture, you can pull off the neoprene loop in about 2 seconds, raise the camera to your eye and expose. It cost about $20 but was discontinued during the Bill Clinton Administration.
As noted in "Choosing a Large Format Camera", when using a monorail view camera on location, you probably aren't going to be carrying it too far (was it Edward Weston who said "if it is more than 500 feet from the car, it isn't photogenic"?). The most convenient way to carry a view camera is with a huge case that lets the view camera hang from its rails. You can have the camera out and set up on a tripod in less than one minute. Jeff Hirsh at Fotocare is probably the best person to talk to for a recommendation.