Exposure
by Philip Greenspun; created June 1999 and revised January 2007
Home : Learn About Photography : Making Photographs : Exposure
by Philip Greenspun; created June 1999 and revised January 2007
Home : Learn About Photography : Making Photographs : Exposure
If you ask a professional for some exposure advice, the typical answer is "f/8 and be there." This is a bit of an in joke. The "f/8" part of it sounds vaguely technical and useful, since f/8 is an actual aperture that you can set on most lenses. But it doesn't mean anything without an accompanying shutter speed or film ISO. The "be there" reminds you that ultimately exposure is pretty easy. The most important thing to have is patience and dedication so that you're around when a great photograph is happening.
As I noted in the chapter on film, the real world generally contains a wider range of tones than you can represent on paper, film, or even with the best digital sensors. You have to make an artistic decision about where you place those tones. Some detail will inevitably be lost as tones that are distinguishable in the real world are mapped to the same number out of a digital sensor or density on film.
This chapter will teach you how to control and predict which details are lost.
Single-lens reflex cameras have an intimidating array of buttons. It will please you to know that there are only three controls that affect the imaged: focus, aperture, and shutter speed. The two controls that affect exposure are aperture and shutter speed.
If neither the subject nor the camera are moving, the shutter speed is not very important. Aperture, however, affects the depth of field and therefore which portions of the image will be in focus.
What is aperture and why is it useful to change it? Aperture is the degree to which the iris or diaphragm inside the lens is opened. Lenses are designed for maximum light-gathering capability. The diaphragm is just like the iris in your eye; it can be closed or stopped down to block off a portion of the light coming through the lens. A lot of expense and weight went into making your lens fast or good at gathering light. Why would you want to throw away some of that capability away?
The first reason to stop down a lens is that the world might simply be too bright. If you're using high-speed (sensitive) film and have a slow shutter that must expose the film for at least 1/500th of a second, using a smaller aperture is the only way to prevent too much light from striking the film and overexposing it.
A more interesting reason is for aesthetic control of sharpness. Suppose the lens has a maximum aperture of f/2. The f-number is the lens length divided by the diameter of the aperture opening. So for a 100mm lens, this would be a 50mm opening. The depth of field will be shallow. Only the object on which you focussed will be sharp. Things closer or farther from the camera will be out of focus. The range of distances for which objects are acceptably sharp is called the "depth of field". Notice the word "acceptably" in the definition. What is acceptable in an 8x10 print viewed from across the room may not be acceptable in the same print viewed at arm's length. What is acceptable in an 8x10 print viewed at arm's length may not be acceptable in a 30x40 print viewed at arm's length.
If you want more objects in the scene to be acceptably focussed, you have to stop down the lens to a smaller aperture, e.g., f/16 or f/22. This nomenclature is a bit confusing at first for beginners because a smaller aperture means that the lens length divided by the aperture diameter gets larger, yielding a larger f-number. Even more confusing is the fact that lenses are calibrated with a strange succession of apertures: 1.4, 2.0, 2.8, 4.0, 5.6, 8.0, 11, 16, 22, 32, 45, 64. Each step represents a halving of the amount of light that comes through the lens. Why? The area of the aperture is proportional to half the diameter squared. So multiplying the f-number by the square root of 2 halves the amount of light coming through the lens.
Let's look at some example images.
With a long lens and a wide aperture, the depth of field is very narrow. Only those objects exactly at the focussed distance will be sharp. For example, here are a couple of images taken with a 600mm lens at f/4 or f/5.6:
Notice that only the birds are sharp and the backgrounds are soft. The effect may seem rather extreme given that f/4 and f/5.6 are not ordinarily considered super wide apertures. Depth of field is related to the absolute size of the aperture not the f-number (lens length divided by aperture diameter). A 600mm lens is a big honker and an f-number of 4 implies an aperture 150mm across. I.e., the depth of field at f/4 on a 600mm lens will be shallower than at f/1.0 on a 50mm lens.
One way to achieve overall image sharpness is to choose a composition
where everything is roughly the same distance from the lens (50mm):
Another approach is to stop the lens down to a small aperture. Note here the leaves in the upper right corner of the frame and the trees at infinity. Both are sharp thanks to the f/16 aperture used on this 50mm lens:
The best way to learn about depth of field is to put your camera on a tripod and expose the same image at different apertures. In these examples, note how much clearer the background is at f/22 than wide open at f/2.8.
f/2.8 |
f/22 |

f/2.8 |
f/22 |
If you're using a single-lens reflex camera, where what you see through the viewfinder is what the film will see after the mirror flips up, you might be confused at this point. You turn the aperture ring on the lens and the image remains just as bright in the viewfinder. Moreover, out of focus objects don't get any sharper as you stop down. You're using a lens with an automatic diaphragm, introduced in the 1960s. The lens will be stopped down by the camera an instant before exposure, just as the mirror is flipping up. If you're just viewing and composing pictures, the lens is kept wide open for maximum brightness. To see what the film will see, you press the depth of field preview button. This lets you visualize in the viewfinder the focus effects of stopping down the aperture but it takes some practice to adjust to the extreme dimming that occurs by f/11 or f/16.
For a given amount of exposure on the film, the shutter speed can be determined by the aperture that you set for aesthetic purposes. If you are taking a portrait and want to throw the background out of focus, choose a wide-open f/2.8 aperture. Suppose that implies a shutter speed of 1/125th of a second. If you change your mind and want to ensure that the background is sharp, stop down to f/22, 6 f-stops less light. The film will need to be exposed for 2^6 times as long. Two raised to the 6th power is 64 so you'll need a shutter speed of 1/2 second to achieve the same density of exposure on film.
A camera with built-in meter can do this calculation for you. Professional photographers most typically use an exposure mode called "aperture-priority autoexposure". The photographer picks the aperture and the camera picks the shutter speed. Does it matter what shutter speed the camera picks? Not as long as neither the camera nor subject is moving. If they are standing up, most subjects won't be able to hold acceptably still for the 1/2 second exposure mentioned above. The photographer will be advised to open the aperture until the shutter speed is 1/15th second or faster. If the photographer is handholding the camera, i.e., not using a tripod, the 1/15th of a second exposure will very likely result in an unacceptable amount of camera shake being recorded on film. When using a normal lens, the general rule is to use shutter speeds of 1/60th or faster. Longer lenses magnify the subject but they also magnify camera shake. The traditional rule for handheld photography is to use shutter speeds of at least 1/focal-length. So if you've got a 250mm lens you'd use shutter speeds of 1/250th or faster. You'll be well advised to use faster speeds if you intend to make big enlargements from your originals. You can get away with slower shutter speeds if you either (1) brace yourself against a solid object, (2) rest the camera/lens on a solid object, or (3) use a lens with electronic image stabilization, as explained in my review of the Canon 600/4 IS lens.
There are sometimes aesthetic reasons to use different shutter speeds. If you are taking a picture of something moving and want to show the motion, you'll need a slowish shutter speed. If you're taking a picture of something moving and want to freeze the motion, you'll need a fastish shutter speed, the exact speed depending on the velocity with which your subject is moving and whether the direction of moving is towards the camera or sideways across the frame (note: the best way to freeze motion is with an electronic flash, which is actually a kind of strobe light; a cheap on-camera flash may have a duration as short as 1/30,000th of a second).

Hummingbird frozen in flight with a Canon on-camera flash (from Monteverde, Costa Rica). 
You need a high shutter speed to capture the fast-moving savagery of two Samoyeds in mortal combat (the obscured face belongs to Alex). Probably around 1/250th. 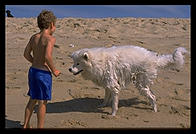
Another good example of photography's ability to freeze motion. This was ISO 100 film on a bright sunny day so it was probably 1/250th or 1/500th at 50mm. 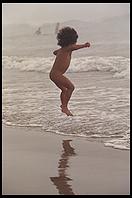
ISO 400 film on a cloudy day at Venice Beach. 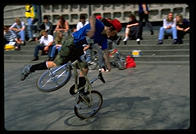
The shutter speed here (Berlin) isn't fast enough to freeze the camera shake induced by the photographer panning to follow the bike rider. Note the blurred arm. The image remains successful because the blurring suggests motion. 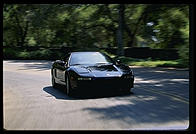
This image was taken from a moving car at 1/15th or 1/30th of a second, slow enough to blur the background but fast enough to keep the Acura NSX reasonably sharp (since the photographer's car and the subject car were moving at approximately the same speed). 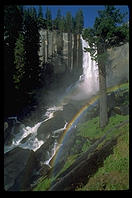
On a bright sunny day with a handheld camera and therefore a fast shutter speed (1/125th?), the water looks more or less as you might see it with your eyes. 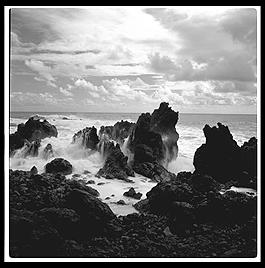
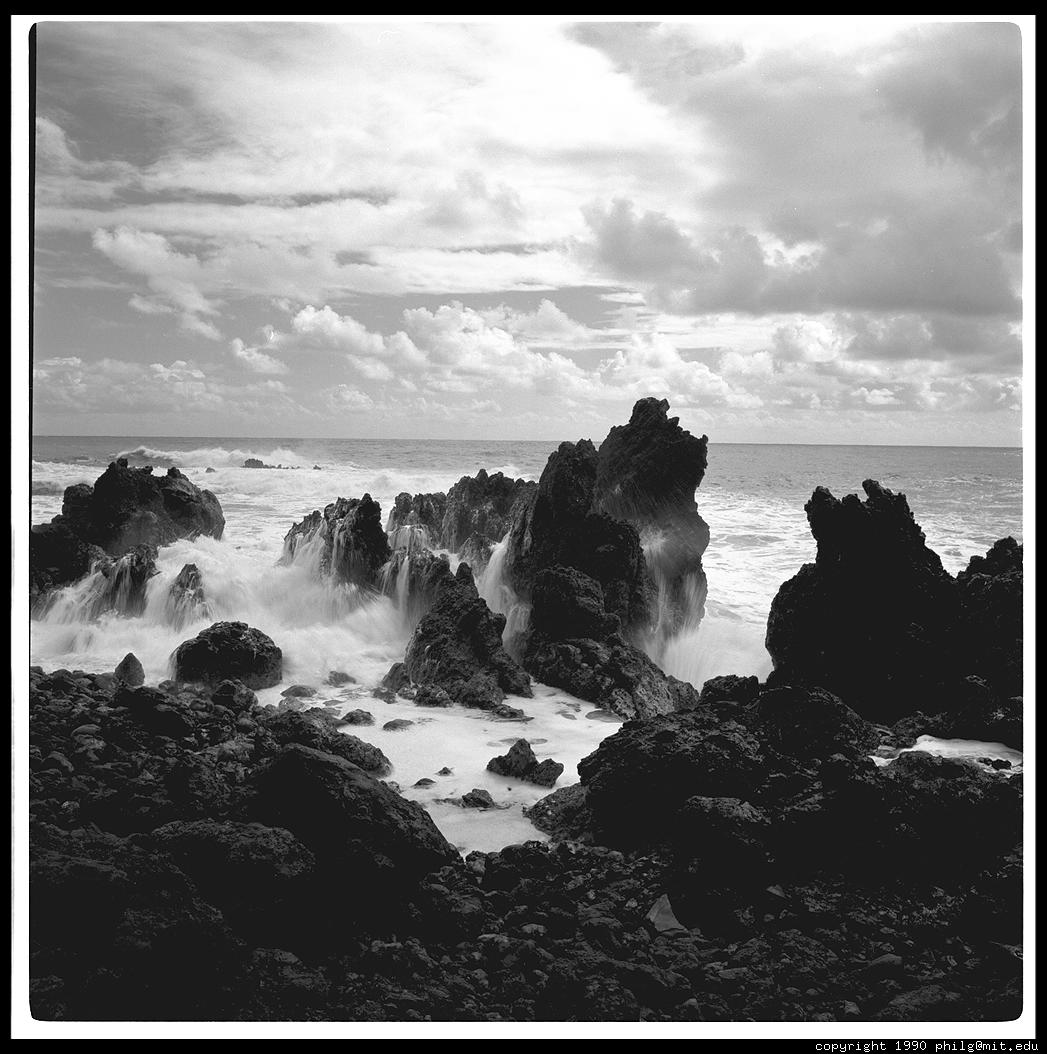
Some softening of the waves breaking over the rocks due to perhaps a 1/4 second exposure (from Hawaii). 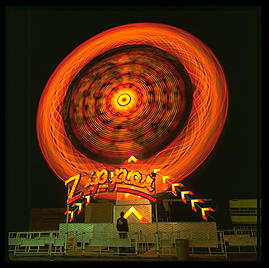
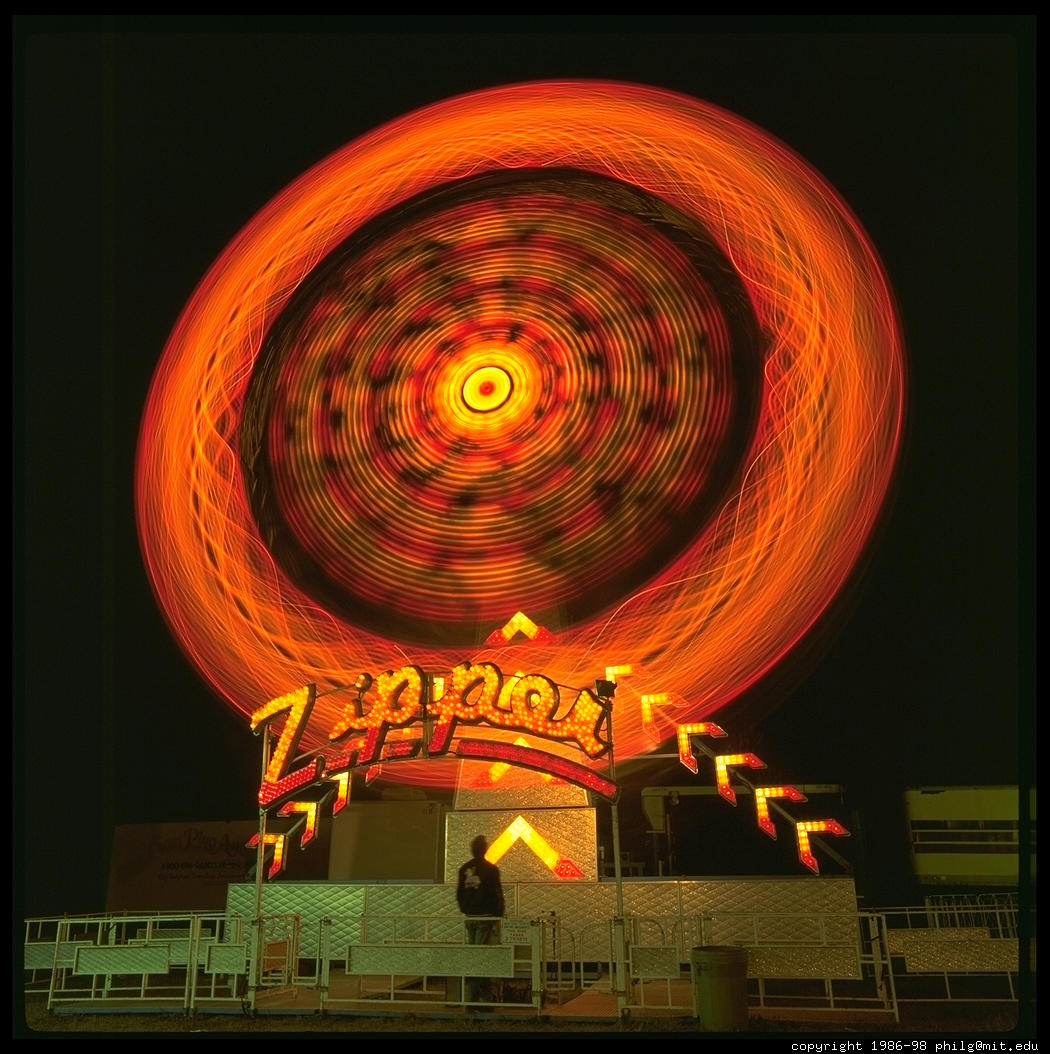
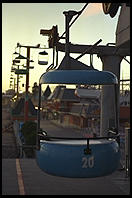
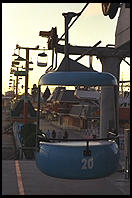
A few seconds at the amusement park. 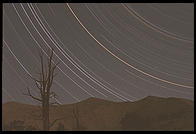
A 6-hour exposure in the Sierra.
Given the information and examples above you ought to have some idea of the aesthetic results you're trying to achieve. If you're interested in the blurring or stopping of motion on film, set the shutter speed first. If you're interested in what will be in focus, set the aperture first. If you can't get a combination that suits you, look for a different speed of film or put a neutral density filter over the lens to reduce the amount of light coming through without changing what is in focus.
How do you know that you're send the right number of photons through to the film so that your result won't be completely black (underexposed slide) or completely white (overexposed slide)? Old-timers using negative film would simply estimate the exposure from their experience, then fix up any minor errors in the darkroom. A somewhat more accurate technique is to RTFM. Here are the instructions included with Kodak Tri-X, a name shared by two confusingly different films (Tri-X Pan is ISO 400 and has good midtone separation; Tri-X Pan Professional is ISO 320 and has more highlight separation):
"Use the exposures in the table below for frontlighted subjects from 2 hours after sunrise to 2 hours before sunset."
Lighting Conditions Shutter Speed (Second)
and Lens OpeningTri-X Pan
Professional
TXP, TXTTri-X Pan
TXBright or Hazy Sun on Light Sand or Snow
Sand or Snow1/500
f /161/500
f /22Bright or Hazy Sun
(Distinct Shadows)1/500
f /11*1/500
f /16¶Weak, Hazy Sun
(Soft Shadows)1/500
f /81/500
f /11Cloudy Bright
(No Shadows)1/500
f /5.61/500
f /8Heavy Overcast or
Open Shade§1/500
f /41/500
f /5.6* Use f/5.6 at 1/500 for backlighted close-up subjects.
¶ Use f /8 at 1/500 for backlighted close-up subjects.
§ Subject shaded from the sun but lighted by a large area of clear sky.
More elaborate recommendations for a wider variety of light conditions can be found in the Kodak Professional Photo Guide.
How well does it work to simply read Kodak's instructions and follow them as best you can? Quite well with negative film; not well enough with slide film; not at all when using electronic flash.
Fundamentally, an exposure meter can be built in two ways. The first is to measure the light falling on the subject that you intend to photograph: incident metering. The second is to measure the light coming off the subject in the direction of the camera lens: reflected metering. The typical handheld accessory lightmeter gives the photographer a choice between these two methods. The typical in-camera meter can only measure reflected light. Both kinds of meters recommend a combination of aperture and shutter speed to the photographer who will then use that recommendation as a starting point when actually exposing film.
When using an incident light meter, the most important source of error of which the photographer must be aware occurs when the light is highly directional. The incident dome may not catch the light exactly the way the combination of the subject and camera lens.
 When using a reflected light meter, the most important source of error
is that the subject's reflectance may not match the meter's assumption
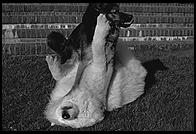
about the subject's reflectance. Suppose that you're taking individual
portraits of Alex and Mia (at right). You measure the light being
reflected off Alex's white fur and set the camera to whatever the meter
recommends. Repeating the image with Mia as the subject you find that
much less light is reflected by her black and brown fur. So the
reflected light meter recommends a wider aperture or a slower shutter
speed than it did for Alex.
When using a reflected light meter, the most important source of error
is that the subject's reflectance may not match the meter's assumption
about the subject's reflectance. Suppose that you're taking individual
portraits of Alex and Mia (at right). You measure the light being
reflected off Alex's white fur and set the camera to whatever the meter
recommends. Repeating the image with Mia as the subject you find that
much less light is reflected by her black and brown fur. So the
reflected light meter recommends a wider aperture or a slower shutter
speed than it did for Alex.
Does this make sense? With negative film, perhaps. Mia is darker and if you want to get her tones into the linear portion of the film's curve you'll need a longer exposure. But consider that if you'd used an incident light meter it would have recommended the same exposure for both dogs. After all, the same amount of light was falling on them. If you'd used color slide film and the incident meter's recommendation you'd get one slide with a white dog in it and one slide with a black dog in it. What if you'd used the reflected meter's recommendation with the slide film? You'd get two slides exposed with an identical amount of light and therefore both would be the same shade.
Exactly what shade do you get when you follow a reflective meter's recommendation? 18% gray. This is a tone midway between 0% gray (white) and 100% gray (black). Reflected meters are calibrated to assume that the average scene is 18% gray. The reflected meter couldn't know that Alex is a white dog and that Mia is a black dog. When you pointed it at Alex it assumed that the day had gotten brighter. When you pointed it at Mia it assumed that the sky had become cloudier.
Is this 18% gray assumption reasonable? If you take portraits of Caucasian people and meter off their facial skin you'll probably find that your slides come out a bit too dark. Typical Caucasian skin is about 1/2 f-stop lighter than 18% gray. So the reflected meter thinks that the subject is lit somewhat brighter than in reality.
Here are some examples:
A dream scene! All roughly the same tone. All roughly 18% gray. (from Italy) 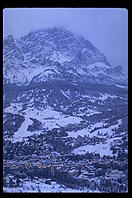
A nightmare. The snow is white but the meter might also pick up on some of the dark trees. And would we really want to add exposure until the white was super white on film? We're trying to suggest evening here. This is a good occasion for bracketing! 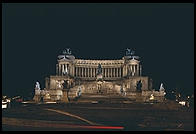
Slightly challenging. The key here is to make sure to meter only the central (illuminated) portion of the frame so that the black sky does not get averaged into the exposure calculation. Then open up 1/2 to 1 f-stop over the meter's recommendation so that the builder is rendered white rather than gray. 
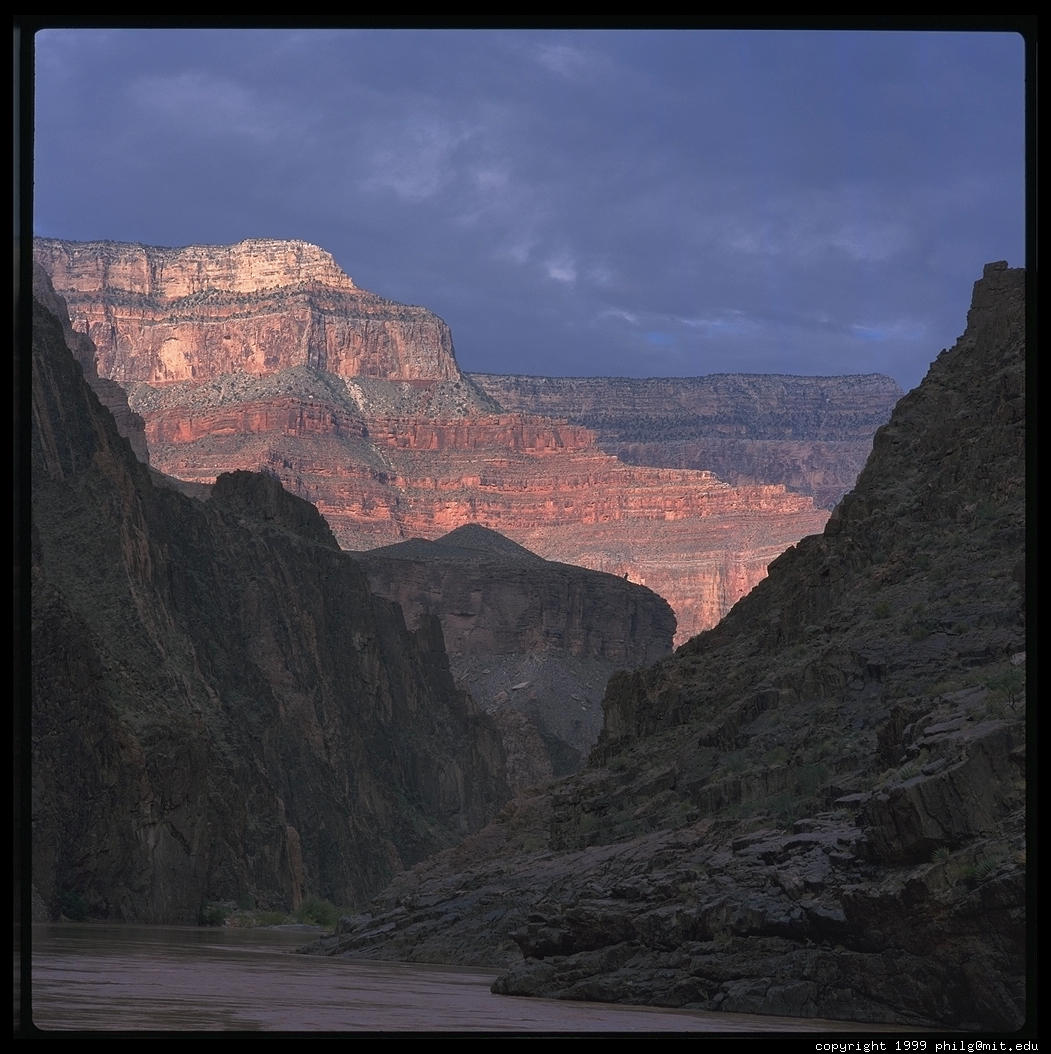
Same challenge. Use the in-camera spot meter of the Rollei 6008 to measure only the brightly illuminated cliff face, then open up 1/2 stop over the meter's recommendation to render it bright on film. Then try another exposure at 1 stop over because it is tough to get back to the bottom of the Grand Canyon. 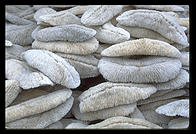
Point, meter, open 1 stop to move the shells from gray to white, click. From Cape Cod. 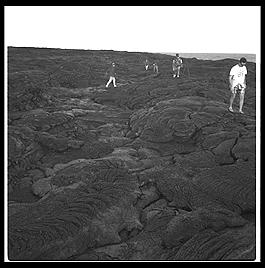
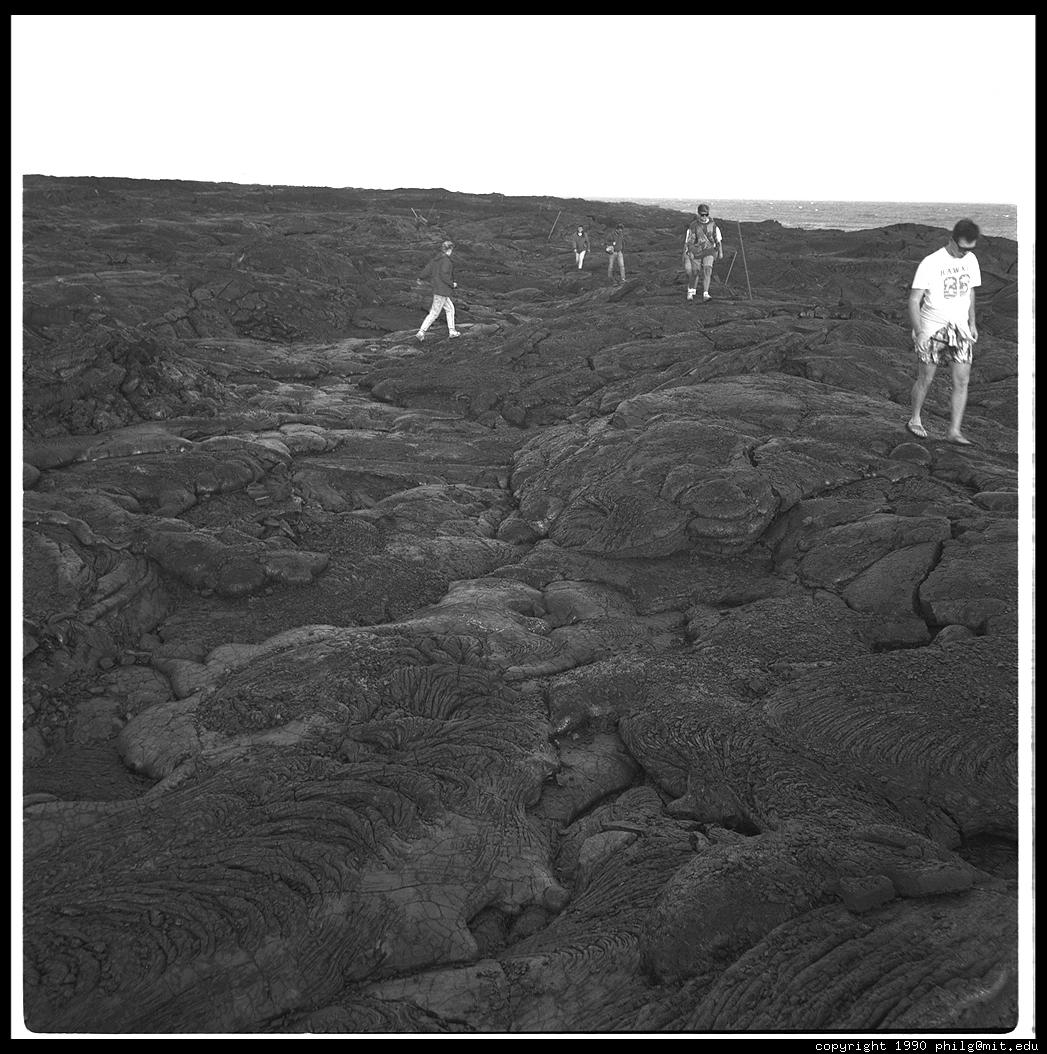
Point, meter, close 1 stop to move the lava from gray to black, click. From Hawaii.
There are some details that can make life painful when setting exposure. As you focus closer to a subject you are moving the lens farther from the film. The lens is throwing the same amount of light in a larger and larger circle of which the film intercepts a smaller and smaller fraction. For small format (35mm) cameras this effect is not significant until you get a macro lens and start taking pictures of things comparable in size to the 24x36mm frame itself. However, if you are taking macro photographs and following the recommendations of a handheld light meter you will find that your pictures are underexposed by 1 or 2 f-stops.
The handheld meter, whether reflected or incident, can't know what impediments there are to light reaching the film. The meter manufacturers assume an ideal lens. Your lens may be covered with a fine coating of dust. Your lens's internal elements will not be perfectly transmissive; some light will be lost each time it goes through a piece of glass within your lens. You may have stuck a filter in front of the lens.
A good way of sweeping away all of these details is the through-the-lens meter. Necessarily a reflected light meter, the metering cells are placed behind the lens and in front of the film, oftentimes built into the viewing system. These cells see what the film will see and therefore if light is getting blocked for any reason the meter simply sets the exposure as if there were less overall scene illumination.
Next chapter: Camera.